|
|


 Main
| FAQ
| Uploader
| IRC chat
| Radio
| Memberlist
| Active users
| Latest posts
| Calendar
| Stats
| Online users
| Search
Main
| FAQ
| Uploader
| IRC chat
| Radio
| Memberlist
| Active users
| Latest posts
| Calendar
| Stats
| Online users
| Search
| |||
| Views: 88,503,352 |
Main
| FAQ
| Uploader
| IRC chat
| Radio
| Memberlist
| Active users
| Latest posts
| Calendar
| Stats
| Online users
| Search
|
04-30-24 05:57 AM |
|
| Guest: Register | Login | |||
| 0 users currently in ROM Hacking | 2 guests |
| Main - ROM Hacking - General SMB3 Hacking Thread | New thread | New reply |
| Mari42 |
| ||
|
Red Paragoomba Level: 17 Posts: 49/54 EXP: 21947 Next: 2796 Since: 12-15-15 Last post: 2191 days Last view: 1641 days |
Posted by SkirdusPosted by Mari42Posted by SkirdusPosted by Mari42Posted by Skirdus Give me your level. I'll address that. |
| Skirdus |
| ||
|
Micro-Goomba Level: 8 Posts: 8/10 EXP: 1583 Next: 604 Since: 06-20-17 Last post: 2498 days Last view: 2498 days |
Posted by Mari42Posted by Skirdus Oh, yeah, here's the ROM: http://wikisend.com/download/174808/Super_Mario_Bros._3.nes |
| Mari42 |
| ||
|
Red Paragoomba Level: 17 Posts: 50/54 EXP: 21947 Next: 2796 Since: 12-15-15 Last post: 2191 days Last view: 1641 days |
Posted by SkirdusPosted by Mari42Posted by Skirdus Ok, be sure you take the link out because we don't allow to post ROM's in here for any illegal percussion. |
| Skirdus |
| ||
|
Micro-Goomba Level: 8 Posts: 9/10 EXP: 1583 Next: 604 Since: 06-20-17 Last post: 2498 days Last view: 2498 days |
Posted by Mari42Posted by SkirdusPosted by Mari42Posted by Skirdus Mhm. The host site takes down the file automatically after a given time, so it's all good. |
| Mari42 |
| ||
|
Red Paragoomba Level: 17 Posts: 51/54 EXP: 21947 Next: 2796 Since: 12-15-15 Last post: 2191 days Last view: 1641 days |
Posted by SkirdusPosted by Mari42Posted by SkirdusPosted by Mari42Posted by Skirdus I know why now! You forgot to change the address for the next pointer. For somehow you didn't change the pointer for next level for the objects and enemies. |
| Skirdus |
| ||
|
Micro-Goomba Level: 8 Posts: 10/10 EXP: 1583 Next: 604 Since: 06-20-17 Last post: 2498 days Last view: 2498 days |
Posted by Mari42 Ah, that did it! Thank you kindly  |
| Mari42 |
| ||
|
Red Paragoomba Level: 17 Posts: 52/54 EXP: 21947 Next: 2796 Since: 12-15-15 Last post: 2191 days Last view: 1641 days |
Posted by SkirdusPosted by Mari42 You need help with custom autoscroll or do you want the address of it? |
| SpookyMulder |
| ||
|
Newcomer Level: 3 Posts: 1/1 EXP: 48 Next: 80 Since: 11-04-17 Last post: 2368 days Last view: 2361 days |
Greetings, I'm new to NES hacking and I'm trying to edit mario's sprite. I've managed to change the actual tile data using tile layer pro, but now I want to change his palette. As far as I can tell SMB3 workshop doesn't edit sprite palettes? I've messed with memory values before but never palettes/colors, I don't really know what format colors are stored in on the NES. Forgive me for not reading this whole thread but can anyone help me out? |
| ahakomi |
| ||
|
Micro-Goomba Level: 10 Posts: 14/16 EXP: 3480 Next: 934 Since: 03-24-16 Last post: 1939 days Last view: 1939 days |
I have a solid question! However i just wanna say hi everyone! I have missed you all so much this year. I've been staying away to work on a relatively easier minihack that im tryng to get out before the end of february. I'm trying to implement a new idea i didnt have in torva or fae earrings.
anyways! SO MY QUESTION IS: I've decided to use a different graphic set for my overworld map pipes. (my first set im making is a plains set) I assume this is possible considering how Sky tower is done in and of itself. I have the SMB3 map utility so if anyone is using that and could explain at least how the pipes work lol. ive already made custom levels for the pipe but when i go into the pipe It starts the level like regular level (I have the header set so that it does nothing when you enter the level) I would imagine i need to set the enemy used for the warp pipes at a certain place but im honesly not that savvy lol. thank you for anyone out there listening. I appreciate it! Happy Holidays you guys! |
| Quick Curly |
| ||
|
Giant Red Paratroopa Level: 77 Posts: 1409/1443 EXP: 4173719 Next: 17410 Since: 06-15-08 From: Earth Last post: 25 days Last view: 25 days |
Hi! It's been a while! Great to hear from you!
I apologize in advance if I'm not fully understanding your explanation. So what you want to know is the correct enemy sprite to insert into your area to make it a level that you can use as an alternative entrance and/or exit like the pipes on the maps in the original game? If yes, that 'enemy' is, "Changes exit location on map (works on warp pipe levels)" (Type 37, 25 in hex). It's visually easier if you refer to some of the "Pipe [x] End [x]" levels in the original game in SMB3 Workshop. Place the sprite at X: 002, Y: [y], where [y] = the Set # for the specific set of pipes that you're using (in hex), as seen in the SMB3 Map Editor while viewing in Pipes Mode. For example, World 3 - Pipe 1 End 1 and World 3 - Pipe 1 End 2 are both parts of the same pipe set. Viewing either area in SMB3 Workshop, the sprite is placed at X: 002, Y: 018 (12 in hex). Viewing that specific system through the SMB3 Map Editor while in Pipes Mode, it's Set #12. Generally, you'll have to make the level using a single pipe system twice; once for the entrance, and again for the exit, with the "Level start" data in the level header accounting for each specific entry point between the two otherwise matching areas. However, depending on what exactly you're planning, you might only require either the extra entrance or exit. Hopefully more information won't be necessary so that you can keep it a surprise! Note that to view the different pipe systems in Pipes Mode in the SMB3 Map Editor, use the Page Up and Page Down keys. You can select one of the pipe pointers by left-clicking on it, and then move it by right-clicking on a different tile/spot. I would provide visuals to paint a better picture, but I'm in a bit of a rush right now, though I don't believe they should be necessary for this subject. However, again, if I'm misunderstanding, then please provide me with a little more specific information, and hopefully I'll be able to help you out. For a little more insight into how the map pipe systems work in SMB3, please refer to this post (June 17, 2015), which includes an image with multiple visuals that help illustrate how the game drops you off at a spot on the map depending on which side of the screen you're on when you exit the area through a pipe. (Or, alternatively, when you run out of time, which can result in the discovery of a potential, previously undiscovered "oversight" within the original game!) For a tutorial providing step-by-step instructions on how to add a pipe system to the World 1 Map, please refer to this post (July 8, 2009). Note that the images aren't available because Photobucket hasn't proven to be reliable after all this time, but hopefully the instructions provided through the text will be enough to follow. Happy Holidays to you too! |
| ahakomi |
| ||
|
Micro-Goomba Level: 10 Posts: 15/16 EXP: 3480 Next: 934 Since: 03-24-16 Last post: 1939 days Last view: 1939 days |
No. You nailed it! Thank you so much! I actually was wondering how I needed to use the pipe enemy! and your information is useful as always! Should I have anymore problems Ill let you know! |
| Quick Curly |
| ||||||||||||||||||||||||||||||||||||||||
|
Giant Red Paratroopa Level: 77 Posts: 1417/1443 EXP: 4173719 Next: 17410 Since: 06-15-08 From: Earth Last post: 25 days Last view: 25 days |
So... over 2 years ago, I said that I was working on a tutorial to modify the ending screens; however, I never went back to finish it because I suck.
I still have the tutorial in its unfinished state from 2 years ago, and because I stopped hacking, I'm never going to finish it. I don't know where to resume with the hacking process and direction for it to see it through to the end, but hey, why not post what I already did and confuse the crap out of anybody who looks at the mess that it is? So, here it goes. Personal criticism and pessimism aside, I hope that what's there can at least help somebody get started with the early edits, and perhaps provide enough direction to figure the rest out themselves. Obviously, I've done this before with multiple SMB3 hacks, although probably not effectively or professionally, and it's been too long for me to go back to figure it out again from scratch in my current mindset. If somebody else wants to use any useful information that might be here to create their own tutorial and/or complete this one, please feel free to, if you so choose. It looks like one of the main and critical things that the tutorial is missing is the specific data for the sprites that are displayed on each screen. However, again, I just can't bring myself to finish it myself. I'm sorry. NOTE: The information in the following post is specifically for the "Super Mario Bros. 3 (U) (PRG1) [!].nes" ROM with the following checksums: CRC-16: CF5C CRC-32: 0B742B33 MD-5: 86D1982FEA7342C0AF9679DDF3869D8D SHA-1: 6BD518E85EB46A4252AF07910F61036E84B020D1 SHA-256: 4377A7F5E6EB50BDD2AC6F249BF1A7085500ACA8EB41F38545C3A2731C51A579 Editing Warp Zone 
You can modify the visual appearance of the Warp Zone in the SMB3 Map Editor. However, a few bits of data will need to be modified directly within a hex editor if you want to change them, and after reading this tutorial, you'll know how! The following offsets account for the spot in the Warp Zone that you are dropped off after using a Warp Whistle, depending on which world you used it in. $A2FA (0x1630A) 0x1630A-0x16312 (0x9) - Y-Position Per World
0x1631C-0x16324 (0x9) - X-Position Per World
Want to move the sprites that display the numbers in case you move the pipes around, or you want to use the sprites to display something else (or nothing at all)? No problem! 0x15194-0x151AF (0x1C) - World Number Sprites in Warp Zone
If you want to change how many bytes are used for the sprites, the code is immediately after the string of bytes for the sprites, starting at 0x151B0 ($D1A0 in RAM):
Change the 1B at 0x151B1 to one less than the number of bytes you want loaded. For example, changing it to 17 will load the sprites to display the numbers for worlds 2 to 7, but not 8 (0x15194-0x151AB (0x18)). If you want to use more bytes for displaying sprites, you'll have to point to a different offset within that ROM bank. There is free space within the range of 0x15554-0x1580F (0x2BC). What you want to change is the $D1A2 part of the code. At 0x151B3-0x151B4 (0x2), change "84 D1" to "44 D5" ($D544 or 0x15554). Now, put your sprites to load here starting at 0x15554 instead, and change the 1B at 0x151B1 accordingly for the number of bytes you want to load. Do remember, however, that only so many sprites can be displayed on the screen at once, so don't try to load too many. The following data is for the world map pointers as they are visible through the SMB3 Map Editor. If you want to switch them around, just keep the data the same, and then that pointer will lead to the correct world in your hack.
Editing End Screens First, let's take a look at the actual endings for the original SMB3, Luigi's Chronicles 2, and Quick Bros. 2 (2008). Original Super Mario Bros. 3 Ending: 
Luigi's Chronicles 2 Ending: 
Quick Bros. 2 (2008) Ending: 
Princess' Ending Message: 0x31AD9-0x31B33 (0x5B)
By using the PPU Viewer and Name Table Viewer in FCEUX/FCEUXD, you can find the tile ID values to display the appropriate letter graphics you need. The last byte to end the message is 00. First off, RAM address $007F is how the game knows which screen the ending sequence is currently on/displaying. Want to change the number of screens to display at the end of the game? The code you need is at 0x31C48 ($BC38 in RAM):
Change the 08 at 0x31C4B accordingly. Decreasing the number of screens like in Luigi's Chronicles 2 is simple enough. However, if you want to increase the number of screens, that means expanding every single one of the tables for variables considered, which more than likely means that you'll also have to change the locations and starting offsets for all of them in order to account for the necessary free space to expand all of them (so that you don't cut into any other code or data). For example, if you change 0x31C4B to 01, the ending will display the World 1 screen, and then proceed to the final "The End" curtain scene. Therefore, the ending will have only one screen. The original value of 08 provides 8 screens. However, the "tables" as they are set by default only account for a maximum of 8 screens. If you want/need more, then the pointers that lead to those tables will have to be changed accordingly.
The following tables of offsets tell the game which graphics to use for sprites on each screen. By changing which CHR-ROM bank is loaded in each case, you can have access to whichever sprites you want to display for each screen. However, you have to know the ID of each CHR-ROM bank in order to load the correct, intended graphics.
0x31F6E-0x31F75 (0x8) - $071B Sprite 1/4 CHR-ROM Bank Per Screen
0x31F76-0x31F7D (0x8) - $071C Sprite 2/4 CHR-ROM Bank Per Screen
0x31F7E-0x31F85 (0x8) - $071D Sprite 3/4 CHR-ROM Bank Per Screen
0x31F86-0x31F8D (0x8) - $071E Sprite 4/4 CHR-ROM Bank Per Screen
0x31F8E-0x31F95 (0x8) - High Byte For Pointer to Load Sprites to Display
0x31F96-0x31F9D (0x8) - Low Byte For Pointer to Load Sprites to Display
0x31F9E-0x31FA5 (0x8) - Number of Bytes (Minus 1) For Sprites Per Screen
Sprite Displays For End Screens:
Applicable code at 0x31EA6 ($BE96 in RAM):
0x32126-0x3212D (0x8) - High Byte For Pointer to Load World Map Tiles to Display
0x3212E-0x32135 (0x8) - Low Byte For Pointer to Load World Map Tiles to Display
World Map Displays For End Screens:
Applicable code at 0x31DF0 ($BDE0 in RAM):
0x325DA-0x325E1 (0x8) - High Byte For PPU Address of Top-Left Corner of World Map Display Per Screen
0x325E2-0x325E9 (0x8) - Low Byte For PPU Address of Top-Left Corner of World Map Display Per Screen
Starting PPU Addresses For World Map Displays For End Screens:
Applicable code at 0x31E1D ($BE0D in RAM):
If you possibly want the screens for your ending to NOT display the world maps, just NOP out the following bit of code at 0x31E5A ($BE4A in RAM):
More specifically, replace "B9 00 06 8D 07 20" with "EA EA EA EA EA EA". While this might not be the most practical way to accomplish it, it works. However, do note that there will still be a large, visible white box where the map was displayed on each screen during fade-ins and fade-outs due to the palette attributes for each screen. You'll have to modify them accordingly on your own to account for your new screens. Now, for the image graphics for each screen. First off, the game determines which screen to display, and then which pointer from multiple pointers to use at any given time from the following "counters" of sorts, in order to display the appropriate graphics/tile IDs. 0x31E39-0x31E40 (0x8) - Starting Counter
0x31E41-0x31E48 (0x8) - Ending Counter
The applicable code, at 0x31E6F ($BE5F in RAM):
Now, each screen has multiple pointers used for locating the unique tile graphics for the text and images besides the map display, curtains and checkered floor. These "counters", if you will, tell the game where the pointers begin and end, effectively determining how many multiple pointers apply to each screen. The related code is at 0x30816 ($A806 in RAM).
Screen 1:
Screen 2:
Screen 3:
Screen 4:
Screen 5:
Screen 6:
Screen 7:
Screen 8:
Immediately following the graphic pointers are pointers related to palettes.
There is free space in the rest of the ROM bank starting at 0x33529 ($D519 in RAM), from 0x33529-0x3400F (0xAE7). You can change the addresses to load tables from in applicable code and place your groups of data within this region to expand them to your will and not worry about cutting into other data sections. However, please be aware that if you use the SMB3TE utility to modify the title screen, the program actually uses this free space to build your modified title screen. Therefore, if you plan to ever use that utility for your SMB3 hack, be sure that you design your title screen first before you design your custom ending! That way, you can make use of the free space starting from the next offset following the end of the data for your new title screen. |
| AlanJacobs |
| ||
|
Goomba Level: 13 Posts: 22/29 EXP: 9783 Next: 484 Since: 08-01-13 Last post: 1832 days Last view: 687 days |
Wow!! Some great info, Quick Curly. Thank you for sharing! |
| Mari42 |
| ||||||||||
|
Red Paragoomba Level: 17 Posts: 53/54 EXP: 21947 Next: 2796 Since: 12-15-15 Last post: 2191 days Last view: 1641 days |
Wow, Quickquirly that looks amazing, and thanks for the ending and warp zone info! I have the new information I would like to add but its pretty decent!
New info for World 5 map function and Custom Auto-Scrolling!
Autoscroll Move End Loop Select
Autoscroll Movement
Autoscroll Repeat Movements
An "Autoscroll movement" is what it moves the screen to scroll within different paths, and "Autoscroll Repeat Movement" means thats it contains coding for you set the the timer and speed for the movements of the scroll. Note: This maybe confusing! As you know, I have a bit of experience of how it works when the scroll is functionally possible as much as the game reads the execution of the binary format depending of how its accumulated the action of scroll to change. You might need a notepad in order to follow where you want the scroll to go, but ALWAYS increase you level length before you add any enemies. Otherwise if you have the autoscroll goes further the screen and the enemies are not in the current screen in any position as you added further to any screen, then it is ABSOULTE REASON WHY YOU NEED TO INCREASE YOUR LEVEL LENGTH! As I meant to say its "confusing" as is depending what movements you want to change is what you will see that the numbers were the opposites! On the Autoscroll Repeat Movement part, you could see that: Biggest number is on the left, and lowest numbers on the right meaning:
If the lowest numbers on the left, and the biggest number on the right then it means that:
Spoiler:
Autoscroll Repeatable movement is known as the autoscroll timer! Tips: Always make sure you know what you're doing when you going to make a new scroll in terms of what you know how to make it work as you're reading this tutorial. Example: So, lets say you want to edit the autoscroll from lost level 9 to use for world 1 airship (unknown):
I've edited the autoscroll myself to make it more consumable:
You can try this code to test this out, but also do your levels before doing so! The autoscroll loop means that once the autoscroll stops at the end, then it loops the movement as it count of the scroll as ENDING scroll! For instance "00" disables the autoscroll loop. "03", or "04" goes up and down as it goes on within ending movements. Example: x13945 - World 3 Airship (04) World 3 Airship was defaulted for an autoscroll to loop at the end. So, if I edited this by putting "00" in HxD then that means the autoscroll won't loop as the game functions its coding. Thats all I can give you for now! |
| AlanJacobs |
| ||
|
Goomba Level: 13 Posts: 25/29 EXP: 9783 Next: 484 Since: 08-01-13 Last post: 1832 days Last view: 687 days |
Hello everyone! We created a discord for SMB3 hacking which you can enter here. If you have any questions or are curious about any upcoming projects, we look forward to seeing you. Good day!
https://discord.gg/jbZhvEz |
| Googie |
| ||
|
Giant Red Paratroopa Level: 77 Posts: 1352/1407 EXP: 4182360 Next: 8769 Since: 02-19-07 From: Brooklyn, NY Last post: 13 days Last view: 13 days |
Posted by AlanJacobs I'm really digging the progress of the hack you're working on, it's coming along pretty cool. ____________________ My Linktree |
| Skeletal |
| ||
|
Goomba Level: 11 Posts: 11/25 EXP: 5567 Next: 418 Since: 11-24-18 Last post: 1976 days Last view: 1975 days |
Posted by AlanJacobs That's pretty cool. I'd like to see you perhaps refer people to this thread however and the board in general, would be a nice little treat. With such a seasoned scene member as Curly on the admin team, it'd be a bit of reassurance  |
| ahakomi |
| ||
|
Micro-Goomba Level: 10 Posts: 16/16 EXP: 3480 Next: 934 Since: 03-24-16 Last post: 1939 days Last view: 1939 days |
I just wanted to say thank you to everyone who continues to work hard to make this game so much fun and show how to do new things. At the beginning of this decade i never dreamt i would have accomplished what i have personally or seen the kind of things I have. I am so thankful to have found this forum and I really appreciate the vast amount f information here that has helped me. I still don't know ASM it's still too intimadating to me but this year I'm going to try to change that. This decade is ending and it's insane how Super Mario bros 3 is still popular after thirty years! I'm so glad that all of us have made the dent that we have with this game and I hope you all continue on your ventures to discover new things. Wish me luck on my ASM journey lol |
| AlanJacobs |
| ||
|
Goomba Level: 13 Posts: 26/29 EXP: 9783 Next: 484 Since: 08-01-13 Last post: 1832 days Last view: 687 days |
Posted by Googie Been a while since I've been here but thank you, Googie. We're getting back into it! Good to hear from you. Posted by Skeletal It's slowly growing. Quick Curly is retired for the most part so I doubt he would be interested in such a position. Posted by ahakomi Good luck ahakomi! Good to see you on Discord and I hope you succeed! |
| DanielFA |
| ||
|
Newcomer Level: 6 Posts: 1/6 EXP: 646 Next: 261 Since: 01-13-19 From: Argentina Last post: 1608 days Last view: 1608 days |
Hi everybody!
I'm really new on ROM hacking and have a problem with the tile arrangement: 
As you see, I've replaced the wood-like floor tiles with the SMB1 cracked terrain ones but the result is awful (only one block is not wrong). I understand that the tiles used on each TSA or object can be changed using an hex editor but can't manage to make it. This is the object I want to edit: 
SMB3 Workshop says it's 'Flat Ground' (Bank 0 Types 192 and 193). This is the original version for reference: 
Could someone help me to correct this? I've tried searching in FCEUX for the tile numbers but found nothing. I've also tried with SMB3 TSA Editor but couldn't really understand how must it be used: 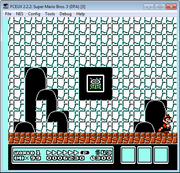
That's the awful result...  |
| Main - ROM Hacking - General SMB3 Hacking Thread | New thread | New reply |
© 2005-2023 Acmlm, blackhole89, Xkeeper et al. |
|
MySQL - queries: 134, rows: 173/176, time: 0.028 seconds. |