Here's an example of how to make a new enemy in Lazy Shell.
This guide has visual aids to help along the way, just click on the links for further insight.
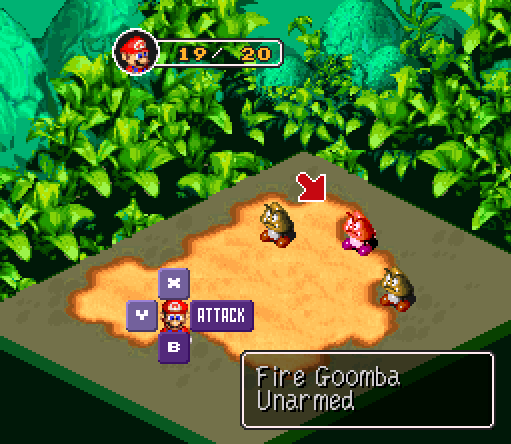
First, you have to decide what enemy you want to make. I want to make a Fire Goomba, so from there I'm going to have to use a dummy monster. I'll start in the stats editor.
"Stats Editor"
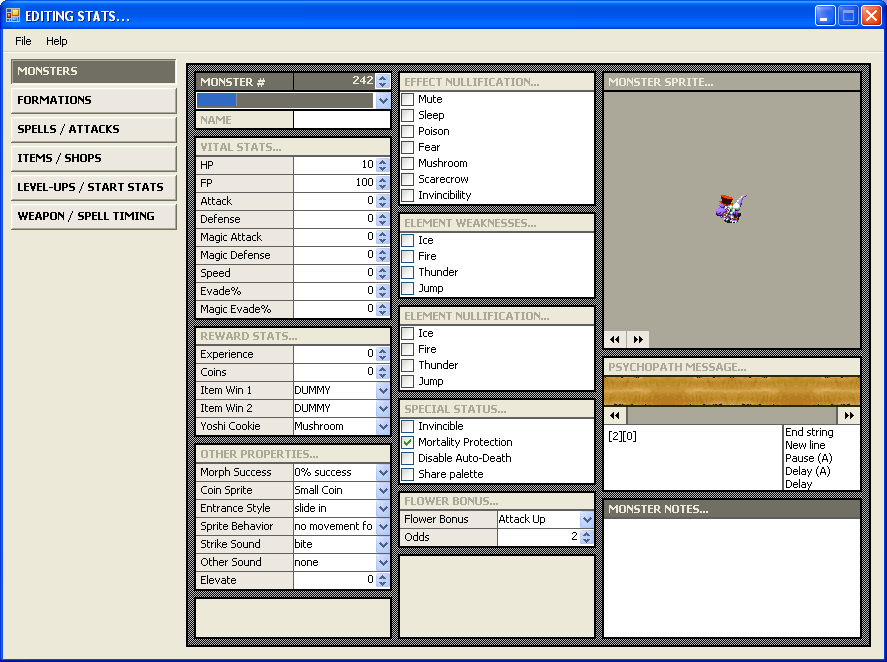
You can see I've chosen a monster that won't be used in game (mosters with no name) and will be safe to use from here on out. This is #242, a Croco dummy. You can see all the different fields and flags you can fiddle with for this monster. I'm going to rename this monster "Fire Goomba" and change its stats to where I want them.
"Monster with desired stats"
Please note that the monsters with no names are actually filled with spaces instead of nothing, so you won't be able to add anything until you delete those spaces. Also, know what spells and effects you are going to give your monster when considering statistics.
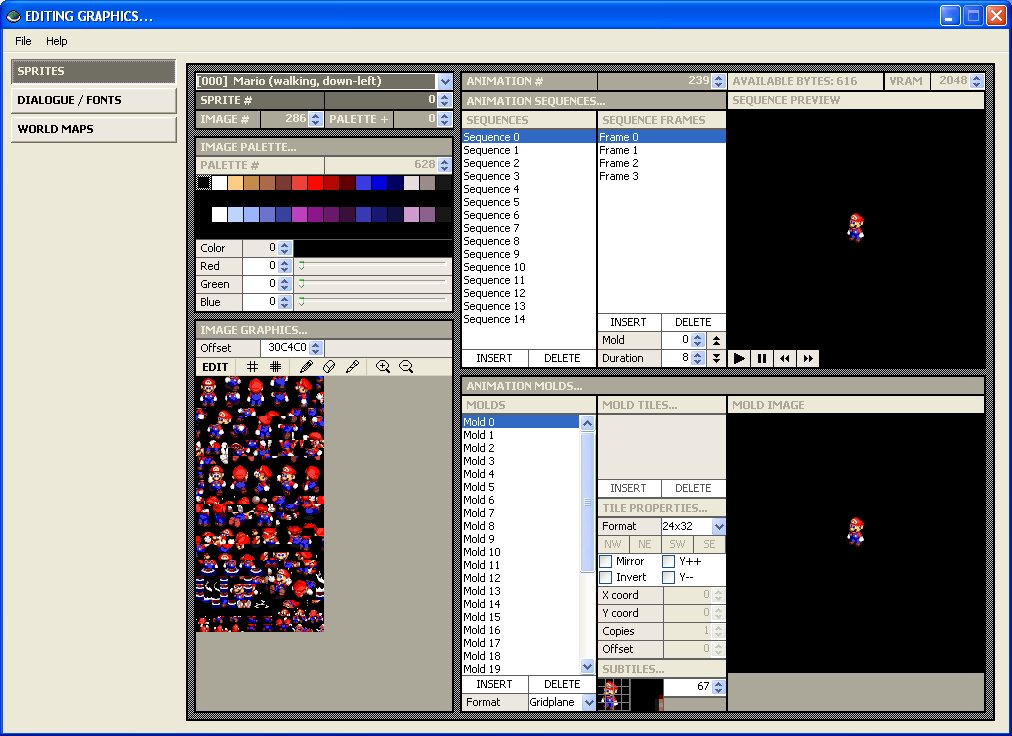
After you've got what you want, we need to give the goomba an image. Right now, it's set at Croco's image, and will animate like Croco in game. To change it, we need to use another editor. First, save your changes (File -> Save Stats; or Ctrl+S), then close out the Stats Editor. Now, open up the Sprites Editor.
"Sprites Editor"
Now, with the sprites editor open, you'll need to choose the monster you were working on. Since this editor refers to the monster in hex, #242 equals $F2 in hex. To get its actual number, add $100 to that, and you end up with $1F2. This is your monster number. Write it down. Note that all monsters are between $100 and $1FF.
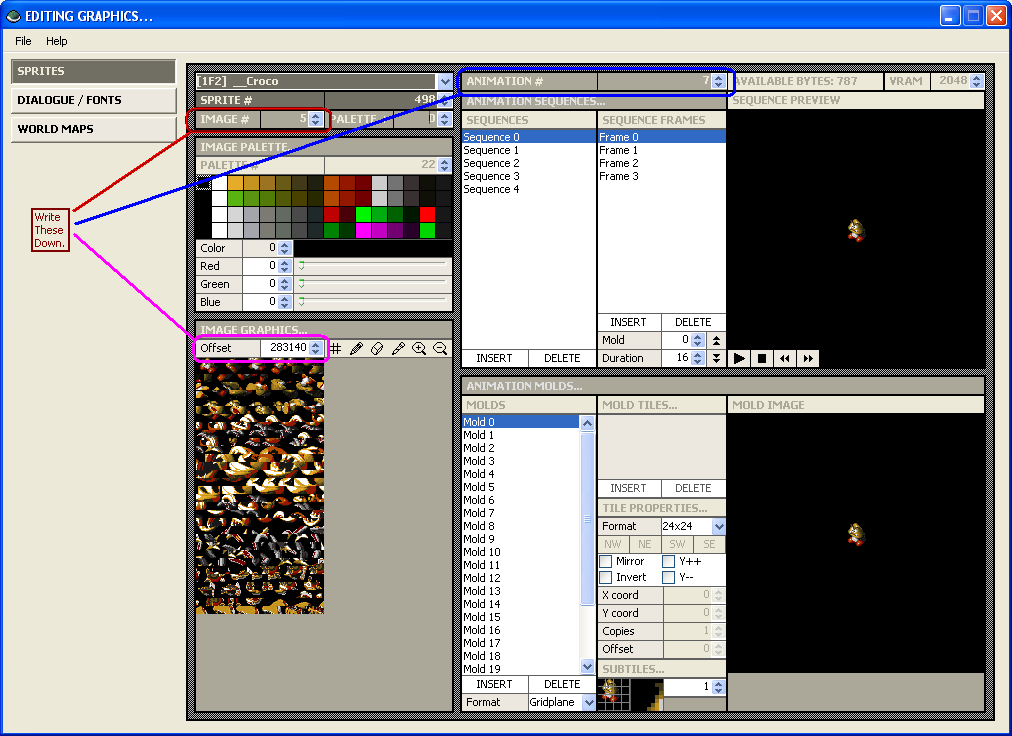
Next, since you want it to look like a goomba, you'll need to get its graphic information. The goomba's number is $106. The information you need is the following:
-Image (5)
-Animation (7)
-Offset (283140)
"Write These Down"
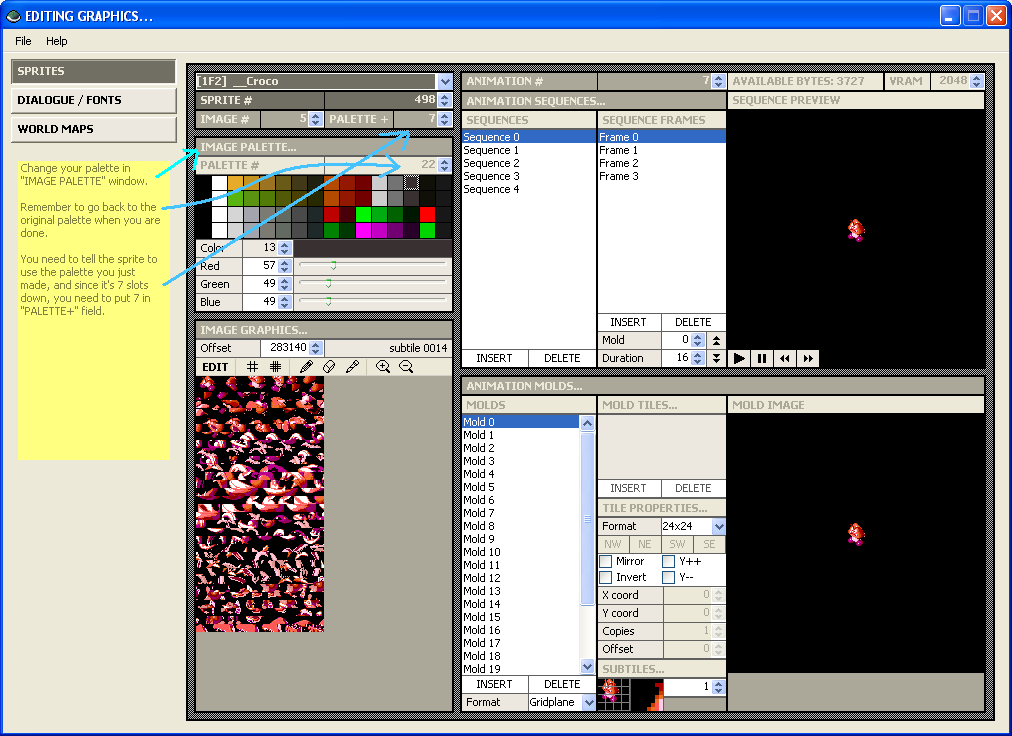
Now that you have this information, go to the monster that you want to change. I've opened up our monster, $1F2. Plug in the information that you wrote down. Viola! You have a Goomba!
Now, you're probably going to want to change your palette, so you need to find an empty one. Browse the palettes with the "IMAGE PALETTE" window, but change it back to its original palette when you're done, because you don't want to change the default palette that all goombas use. Find a palette that is all black. Note, you can only go a maximum of 7 slots down. Once you find one, (Mine's 29) calculate the difference (29 - 22 = 7) and write it down if you need to. You can now make your palette. Once you make your palette, Go back to the original palette and put the number you wrote down in "PALETTE +". Note that the "Gu Goomba" sprite uses a "1" as a value here, so it will use the palette one slot down from its default. This is why you have to keep the default the same, or anything that uses the default will change too.
"Finished Palettes"
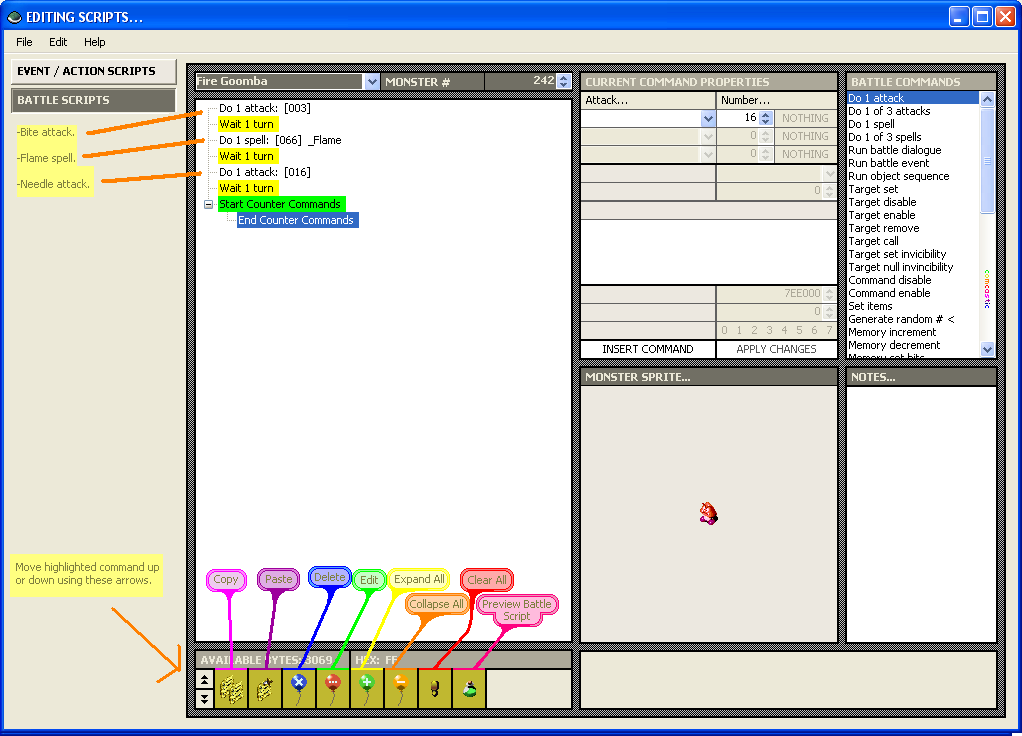
Now, this goomba will animate the same as a normal goomba, but will have a different palette! Now, you need to change how it acts in battle. So, on to the next step! Save your changes in the menu bar and close out this editor. Open up the Scripts Editor. Click on the "Battle Scripts" button to the very left and choose your monster from the list. It should be labeled what you named it earlier, mine's "Fire Goomba". If you can't find it, you can go by the monster number. Mine is #242.
"Scripts Editor"
This next part is entirely up to you. This editor is pretty much self-explanatory. To insert a command, choose one under "BATTLE COMMANDS", edit it the way you want it in the "CURRENT COMMAND PROPERTIES" window, then hit "INSERT COMMAND". To edit one, double-click one under the main script tree, change it how you want in the "CURRENT COMMAND PROPERTIES" window, then hit "APPLY CHANGES".
[NOTE] For a more (much more) detailed explanation on Battle Scripting, please check out this thread:
http://acmlm.kafuka.org/board/thread.php?id=4592
"Finished Script"
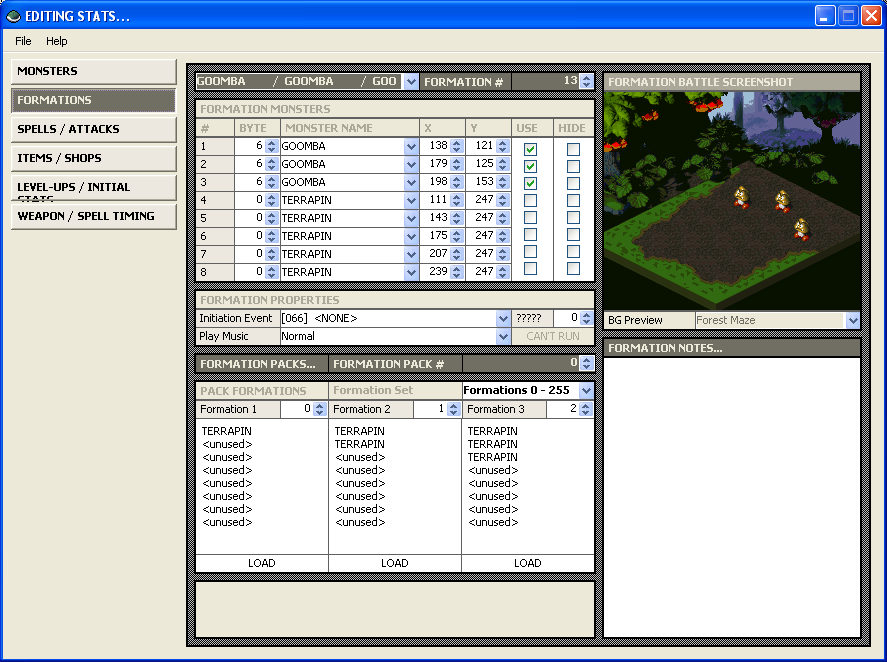
Once you are done with your script, save and close the editor. You're almost finished! Now all you have to do left is tell the game where this monster will appear. Open up the Stats Editor again. This time, click on the "FORMATIONS" button to the very left.
"Formations"
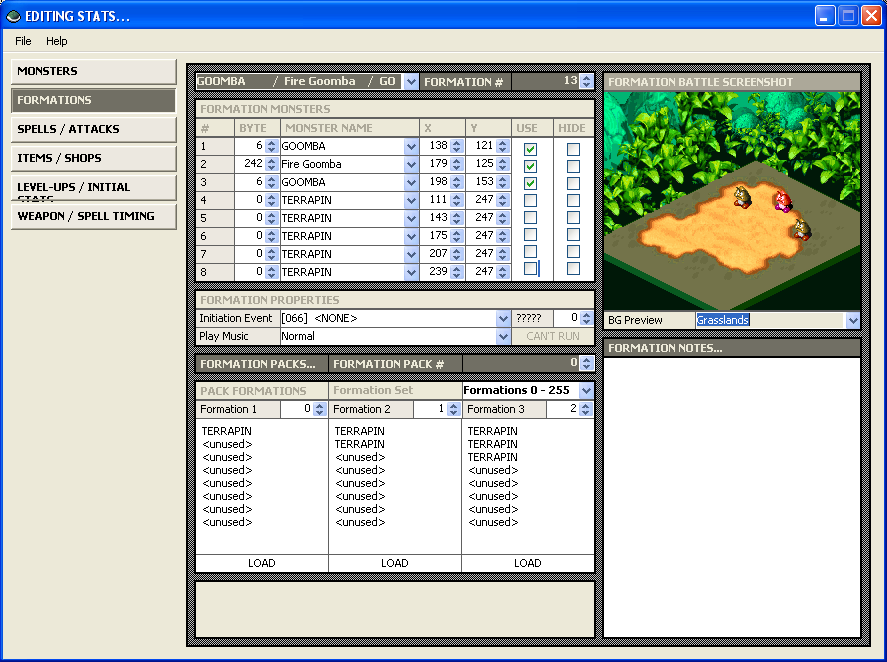
We're going to focus on the top part of the window. Change the formation to #13 (or whatever you want your monster to appear in) and you'll see a preview of how it looks in battle. You can drag your monsters in the preview window to move them, or you can just set them using the value fields themselves. Change one of them to the Fire Goomba (or your new monster) and make sure it's checked "USE"... otherwise, it will just be ignored. Of course, you can just add the monster (as opposed to replacing it, like I just stated) by adjusting its X/Y position, checking the "USE" flag, and setting the monster.
"Done!"
Now that you're totally finished, save your changes and close out the editor. Now, this next step is a crucial step, so don't forget to do this. In the main window of Lazy Shell, go to "File --> Save Rom". Since all you've been doing up to this point is saving to an *image* of the rom, just closing out the editor won't save changes to the actual rom you opened. Following this last crucial step saves all the changes you made in this guide so far to the actual ROM.
Below, I've included the IPS patch of my finished product, the Fire Goomba. You can see it when you encounter a group of three goombas in Mushroom Way. Have fun, and don't get burned!
smrpg_tut_fg.ips (213.5K)____________________


 Main
| FAQ
| Uploader
| IRC chat
| Radio
| Memberlist
| Active users
| Latest posts
| Calendar
| Stats
| Online users
| Search
Main
| FAQ
| Uploader
| IRC chat
| Radio
| Memberlist
| Active users
| Latest posts
| Calendar
| Stats
| Online users
| Search